Shooting Star Trails
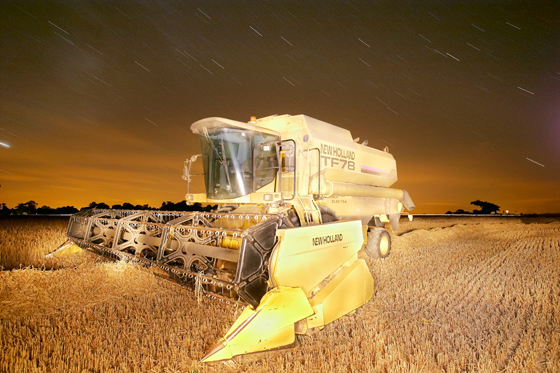
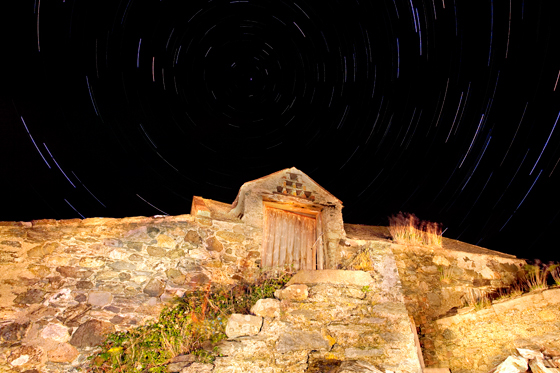
Photographing Star trails is actually a relatively simple technique that can conjure up some wonderful eye catching images. As the earth rotates, the North Star will appear to remain fixed whilst the other stars appear to rotate around it. During long exposures we are able to record the motion of these stars in our images.
Planning plays a pivotal role in achieving successful star trail images. Before heading out I pay close attention to the weather forecast to ensure it’s going to be a clear night, I find websites such as Metcheck and Wunderground are particularly useful as they will give a cloud coverage breakdown for set times every three hours. Subject matter is a personal preference but I like to include subjects with a strong outline against the sky in my images such as a church, barn, lighthouse or windmill, by using a compass I can also work out which direction the North Star will appear and if possible include this in my images. Once I have found my location I try to set up my gear whilst it’s still light and make sure everything is in order. By arriving whilst it is still light it is much easier to focus and compose the image. I begin by setting up my tripod and composing and focusing the picture, a good solid tripod is essential here and its important to make sure that it’s on solid ground with no chance of moving during the long exposure. At this point I also like to check there is plenty of memory and fully charged batteries in the camera.
Its then a matter of waiting for it to get dark enough before I begin shooting, if I want to recompose an image or re focus in the dark then a large powerful torch is really useful. Its very difficult to see much through the viewfinder so once I think I have everything set up correctly I like to take a short test shot. To do this I select a high ISO setting on my camera, I then take a test shot of around one minute using the bulb facility and a cable release and examine the image on the LCD to check for distracting elements and to check the focus. At this point I also like to check the exposure is correct, the test shot is also a great way to gauge how long the main exposure will need.
A little bit of Maths is required here, but just remember that every time we increase or de-crease the exposure by one stop we are doubling or halving the amount of light coming into the camera. So if a an exposure of one minute is correct at ISO 1600 and we increase that exposure by one stop to ISO 800 then we are doubling the exposure time so the new exposure time would be two minutes, just keep doing this until you get to your chosen ISO and aperture settings to give you your final exposure time.
Stacking Method Or One Long Exposure
To capture star trail images for the main image we have two options, the first is to shoot one long exposure and leave the shutter open during that time, the second process we can use is to shoot lots of shorter exposures and then combine these later using computer software. Both techniques have their advantages and disadvantages. If shooting lots of shorter exposures then exposure times of around 30 seconds work well here. Long exposures increase the amount of noise in the image so the shorter exposures of around 30 seconds stacked together will have less noise. The disadvantages of this technique are that you use more space on memory cards and hard drives, your post production work is increased and the major disadvantage is you have tiny gaps in the star trails. One of the real advantages of the stacking method though is the ability to remove images you don’t want stacked in the sequence such as a frame where a plane with lights has flown through the image or you can even remove a number of frames afterwards to dramatically reduce the exposure of the image. There are a number of software options available to combine the stacked images but one that I have found particularly good is a free piece of software available at www.Startrails.de.
 So to begin shooting using the stacking method we need to set our camera to continuous drive mode, this means when we lock open our shutter when setting a sequence of 30 second exposures.Set your shutter speed to 30 seconds and select your chosen ISO and aperture settings, ISO 400 and F8 often work well.
 We need to illuminate our subject with some light, I find a large torch gives off a nice warm light and offers you lots of control over what parts of the scene you illuminate. You can also use flash. I save this part of the process to the last five or six frames, this means if we over expose the areas we paint with the torch we can simply take a few of the last frames away.

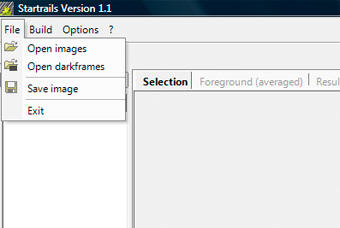
To start the post production stage open up the star trails software, click file, Open images and then select all the frames minus the dark frame. Now select file, open and load in the dark frame. Now we have all our image ready simply click build and then star trails, we now need to wait a while and let the software do its stuff, when the image is completed simply click file and then save as and the image is complete.
Star Trail Tips
Star trail images are always eye catching, but just like photographing images in the day we need to find a good subject and a good composition. Whilst pictures of a night sky alone will result in good star trails if there is no subject matter to the image then they will rarely work well. For stunning images try locating the North Star in your composition, as the earth rotates the other stars will appear to spin around it.
Clear skies are essential for photographing star trails so avoid nights when there is a chance or thick cloud blowing in during the long exposure.
Exposures for star trails can range from several minutes to several hours, the overall exposure length will depend on the amount of motion you wish to capture. One of the major problems with digital cameras during long exposures is there are power hungry, with this in mind I normally limit my exposures to less than 90 mins unless I am using a battery grip with the facility to hold more than one battery at a time.
To help aid with focusing in the dark shine a powerful torch on your chosen subject, once your camera gets a focus lock switch your lens to manual focus so that it doesn’t hunt when you press the shutter button.
Take a compass with you and work out the position of the North Star. As the Earth rotates the North Star will appear to stay fixed and the rest of the stars will appear to rotate around it.
It can get very cold at night particularly when standing around waiting for long exposures so warm clothing is essential.
Safety In Numbers
Night photography can be quite daunting, I like to photograph subjects in remote areas where you don’t attract as much attention. Strange noises & wildlife moving in the bushes can be quite spooky especially if you are on your own, but you soon get used to it. This does put a lot of photographers off from shooting night photography especially lone females. With this in mind I began offering one day workshops photographing at night in Norfolk, UK. I usually hold two or three one day Painting With Light & Star Trail photography workshops throughout the year, these are priced at just £50 and are offered on a first come first served basis. For more details on one day workshops offered in Norfolk, Suffolk, Essex & Derbyshire please visit the workshop section on my website at http://www.theuklandscape.com/Workshops.htm


